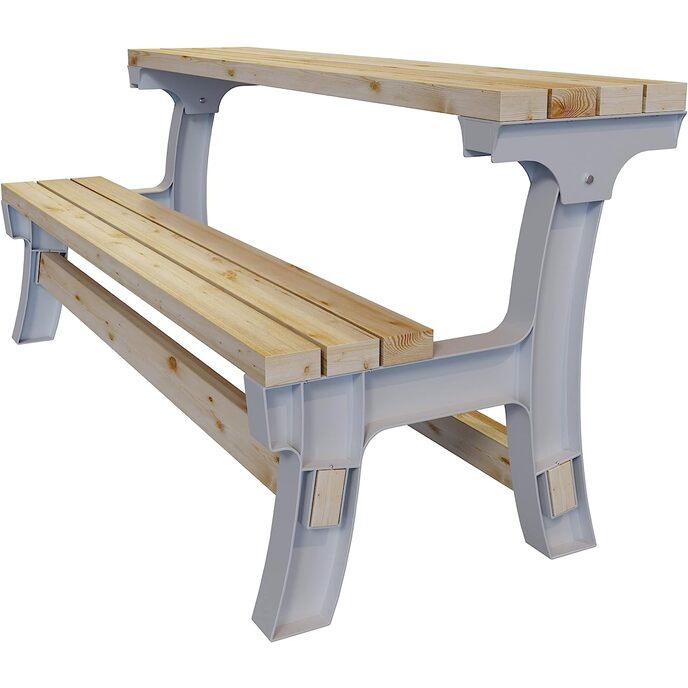
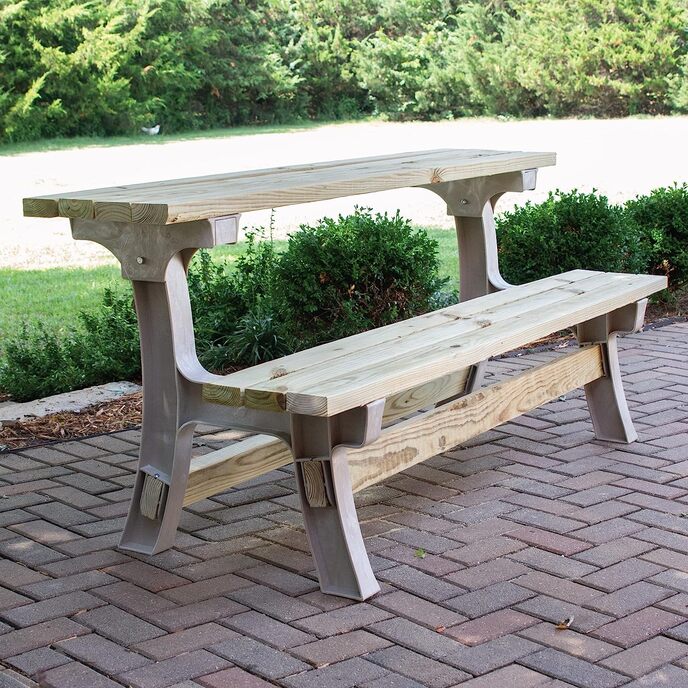
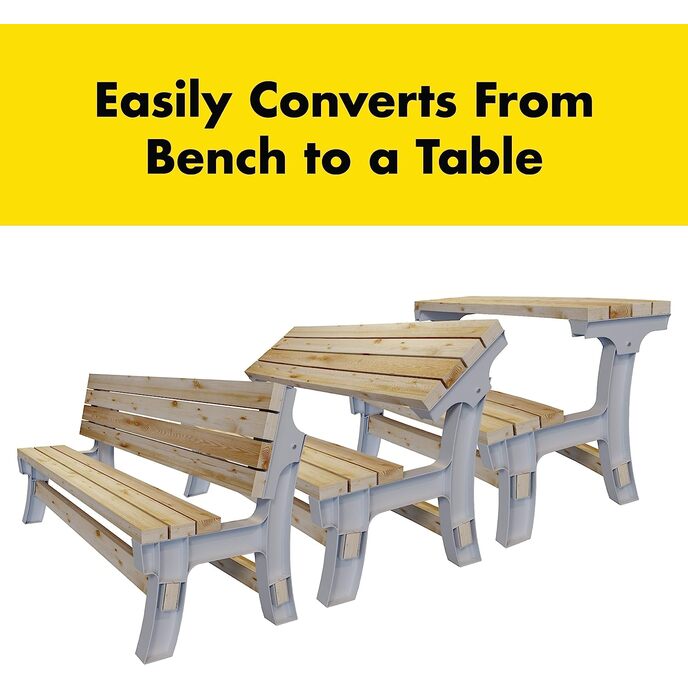
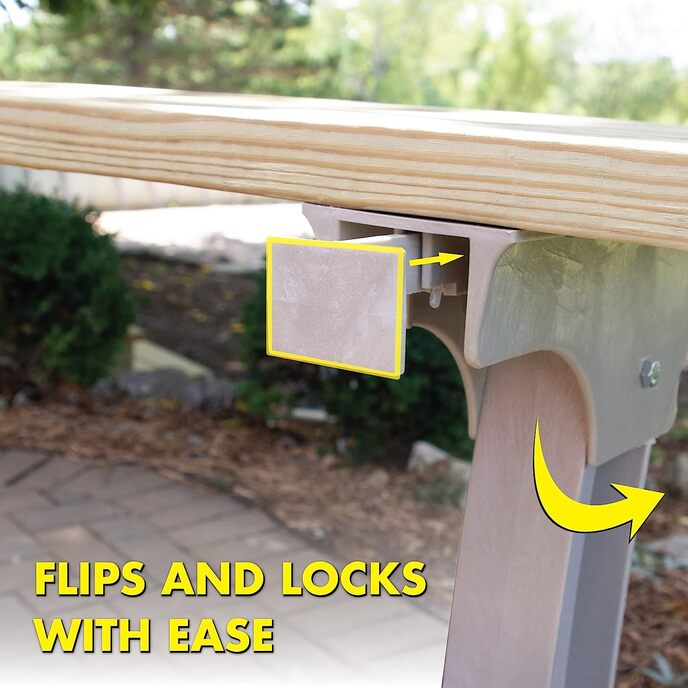
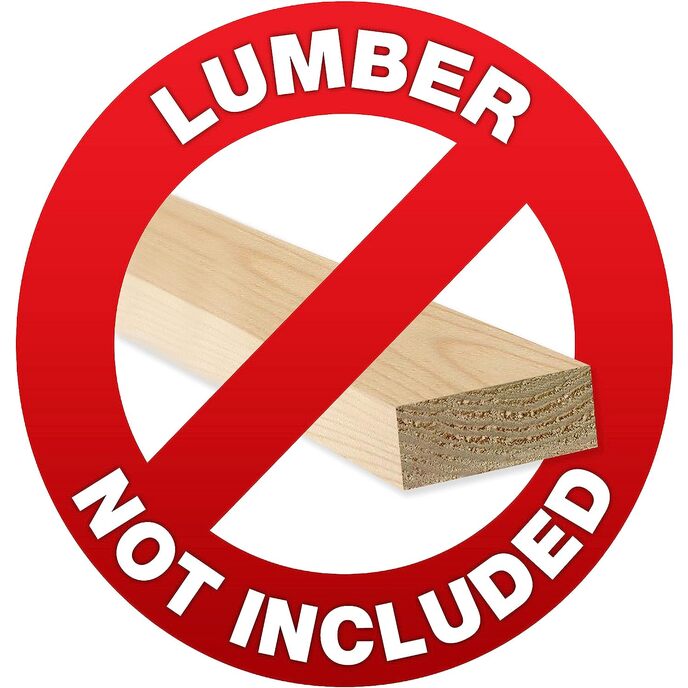
I bought these to make a bench for our front porch as the one we had out there had rusted and fallen apart and I didn't feel like spending the money on a new one. Plus, I like to make things myself when I can. From start to finish it took me a few weeks. It wouldn't have taken so long if I had more free time, but I work and am mom to an autistic 5 year old so time for projects is sparse. In case you're curious, here's what I did, what I like and what I don't like about this kit. First and foremost, I didn't care for the "sand" color these come in, so when they arrived, I immediately spray painted them black. I wish they came in a better variety of colors, but painting them wasn't too hard, just time consuming. In the end it was worth the extra time and money. I'm glad I did it. After painting the legs and hinges etc., I went and bought the wood. I opted for a mid grade douglas fir pine (something like $7 per plank at Home Depot), took it home and cut it to the lengths specified in the instructions. I wanted my bench to be about 4.5ft to fit the space I was building it for. After cutting the wood I sanded and wiped it down, then stained it with a dark walnut stain. That was probably the most time consuming part of the whole thing. After the stain dried I coated all the pieces with an oil based polyurethane. Once that dried and the wood was all ready, assembling the bench only took an hour or so. The instructions are clear and easy to follow, and all the hardware is included. All you need is a drill, a 1/4" drill bit and a screw driver (and some contortionist skills and patience). All finished, the bench looks and works great and is very sturdy! So here's what I didn't like. - Color: I mentioned this before, but I wish they offered more/darker colors than just sand. It was annoying to have to paint them myself. - Scuffing/Quality: In the instructions, you have to flip the bench over during one step, putting the front legs on the ground. I was doing this project in my garage and was VERY gentle and careful while doing it, but the plastic of the legs still got quite scuffed and marred during this step and the paint I had put on came off (see pics). This concerns me a little about the quality of the plastic used if it could be so easily damaged during assembly. I hope it holds up well. - Design: For the most part this is well designed but there are a couple aspects in which it is really not. First, the legs are designed such that it is virtually IMPOSSIBLE to use a power drill/screw driver to make perfectly vertical holes because of the way the plastic molding is done around the spots where holes need to be drilled and screws inserted. This was SO FRUSTRATING! It's hard to explain but if you buy this you will definitely understand what I mean, especially when it comes time to attach the seat. This is a big design flaw in my opinion. Additionally, in the last step of putting the seat on, you can't flip it over so I had to lay on the concrete and drill up into the wood (but not straight up because that's impossible as per the first comment). Putting the seat boards on was really obnoxious and frustrating. I really think they could've planned for this better to make it easier. As a result of these problems, some of my seat and stringer board screws went in sideways or are somewhat sticking out of the side of the wood. They really don't leave you much room to drill holes and insert these screws if you measure and cut the wood according to their specs (see pics). That was also frustrating. Again, this is hard to explain but you'll know what I mean when you see it. Lastly, the locks that you push in when it's in table mode hang down when it's in bench mode and you can't push them up out of sight. It's not a huge deal breaker, but they're unsightly and I would love for them not to be so noticeable. - Cost: Notice I said "cost" not "price". While I think this is a pretty fair price in general, when I think about how much I spent on wood, paint, stain and polyurethane and all the time spent working on it, spending a couple hundred dollars on a new professionally made bench doesn't seem so unreasonable anymore. If you take this on, just be prepared that it might "cost" you a bit more in terms of money and effort and time when it's all said and done, depending on what you're making and how much finishing you want to do. - Brand placement: This is something that always drives me nuts. I don't want your companies brand (2x4 BASICS etc) tattooed in huge letters on both sides of both legs of this bench that I made. It looks cheap and tacky and less personal. Feel free to put your brand on there, but please put it somewhere less noticeable. All that being said, I have an end result that works well, looks nice and I have the sense of pride and accomplishment that comes from doing it myself! That's worth something too. Hopefully this has been helpful to someone else looking! I did NOT receive this for free or at a discount.